How to Create Your First Social Media Carousel With AI
Today, I’m going to walk you through creating your very first social media carousel using the amazingly intelligent Rusher.ai.
Imagine having a beautiful, engaging carousel for your social media, prepared in half the time it usually takes—and all thanks to the wonders of AI! Excited? Let’s get started!
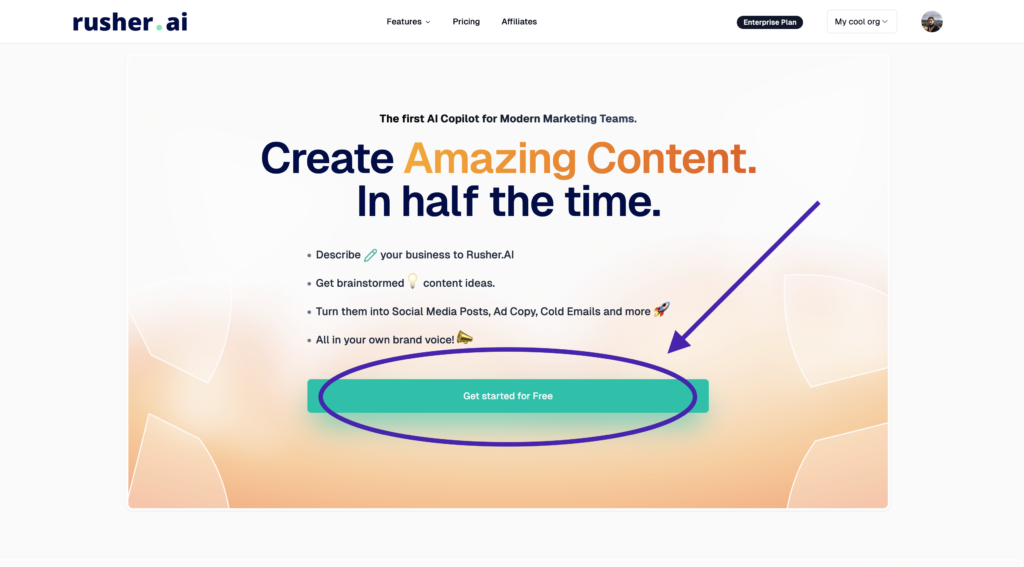
1. Clicking the Big “Get Started For Free” Button
Alright, first things first. Head over to the Rusher.ai homepage. You’ll notice a massive “Get Started For Free” button glaring at you—go ahead and click it. This magical button is your gateway to a world of effortless content creation.
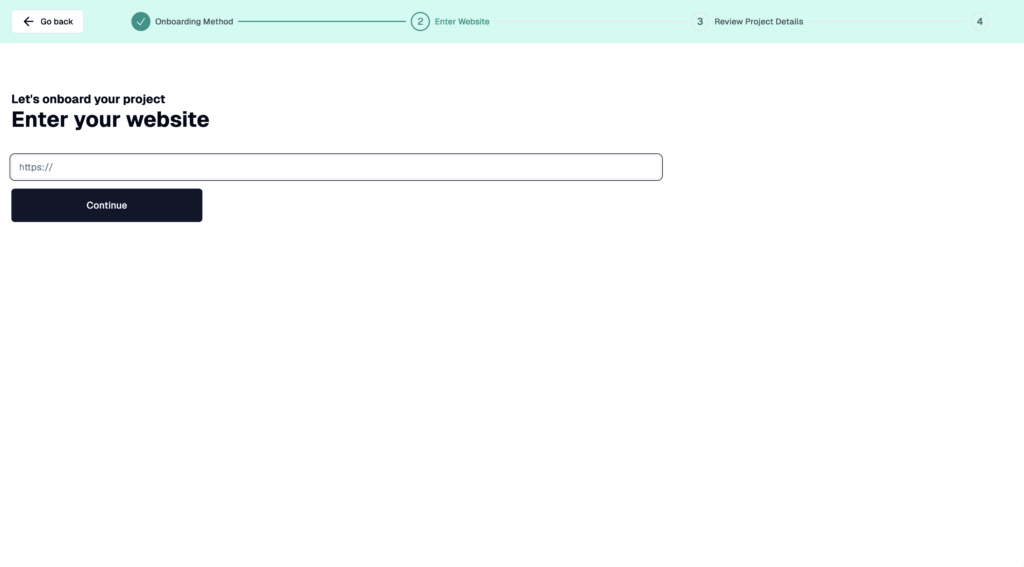
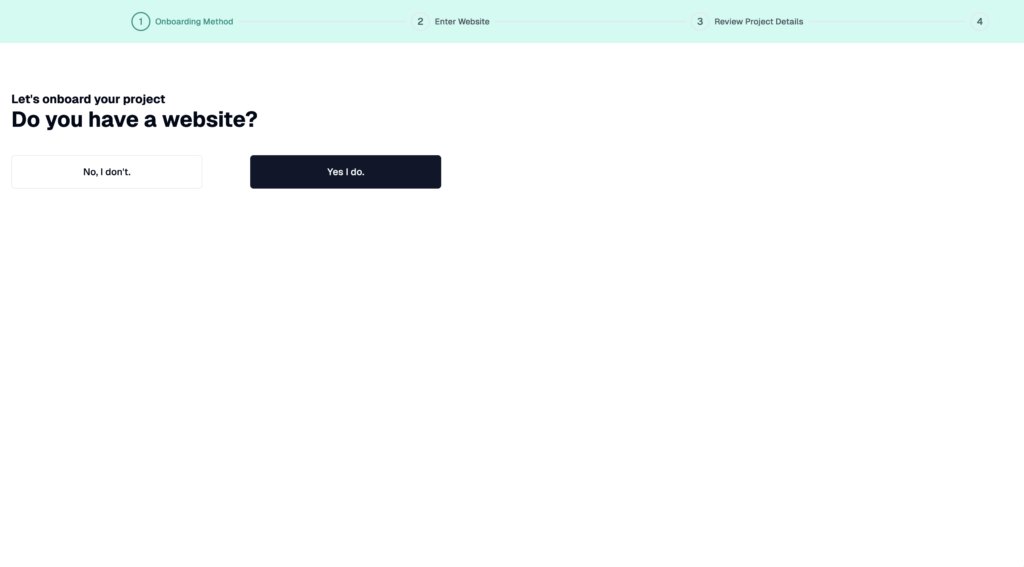
2. Onboarding Your Project
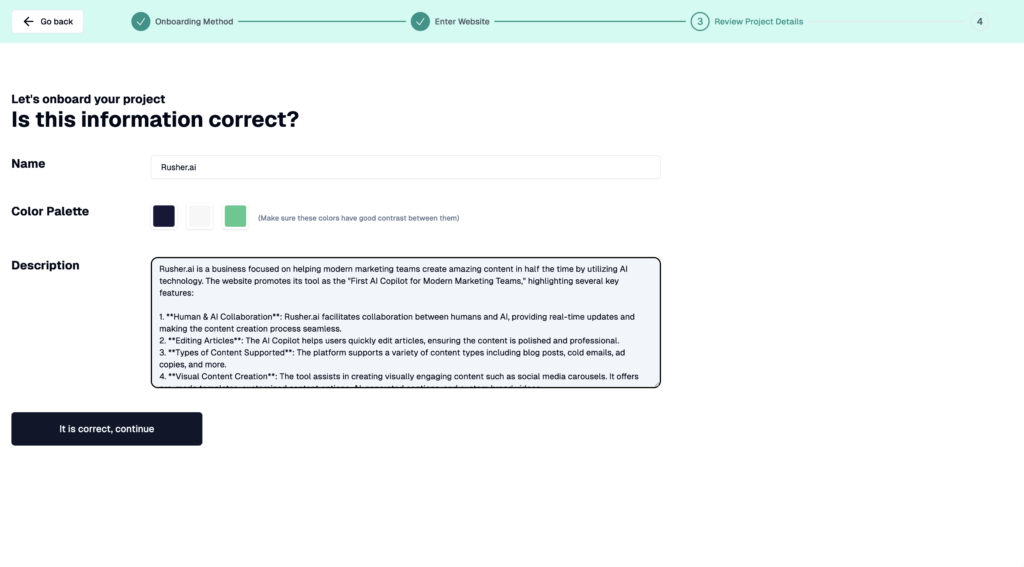
Now that you’re in, it’s time to onboard your project. If you have a website, our savvy AI scraper will do the heavy lifting for you. It’ll go through your site, absorb all the juicy details about your business, and understand what you’re all about. Don’t have a website? No worries! Just fill in your project details manually. Be as detailed as possible in the project description field—this will help Rusher.ai personalize your content accurately.
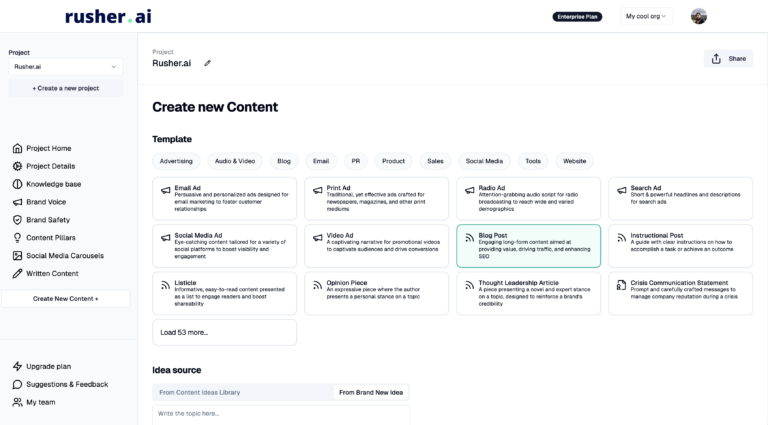
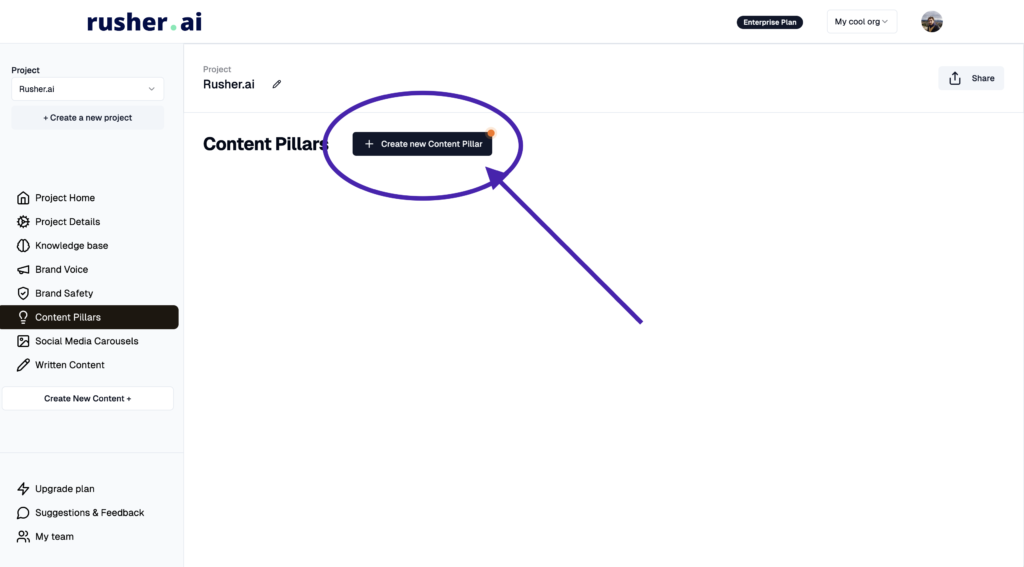
3. Exploring the “Content Pillars” Section
Once you’ve set up your project, you’ll be directed to the “Content Pillars” section. If you’re scratching your head, wondering what content to create, this is where Rusher.ai becomes your idea-generating soulmate. The AI will generate content ideas based on the information you provided. Got your own ideas brewing? Awesome! This tool will help you enhance and organize them.
Placeholder image: Screenshot o
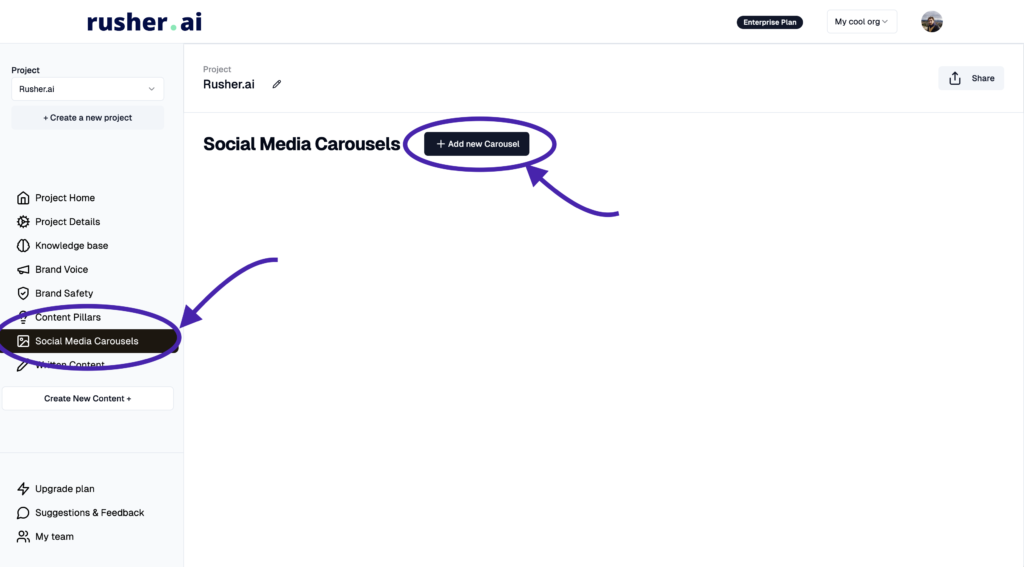
4. Navigating to the “Social Media Carousels” Section
You’re knocking it out of the park so far! Now, let’s head over to the “Social Media Carousels” section. From the main dashboard, find the Social Media Carousels tab and click on it. This is where the real magic happens.
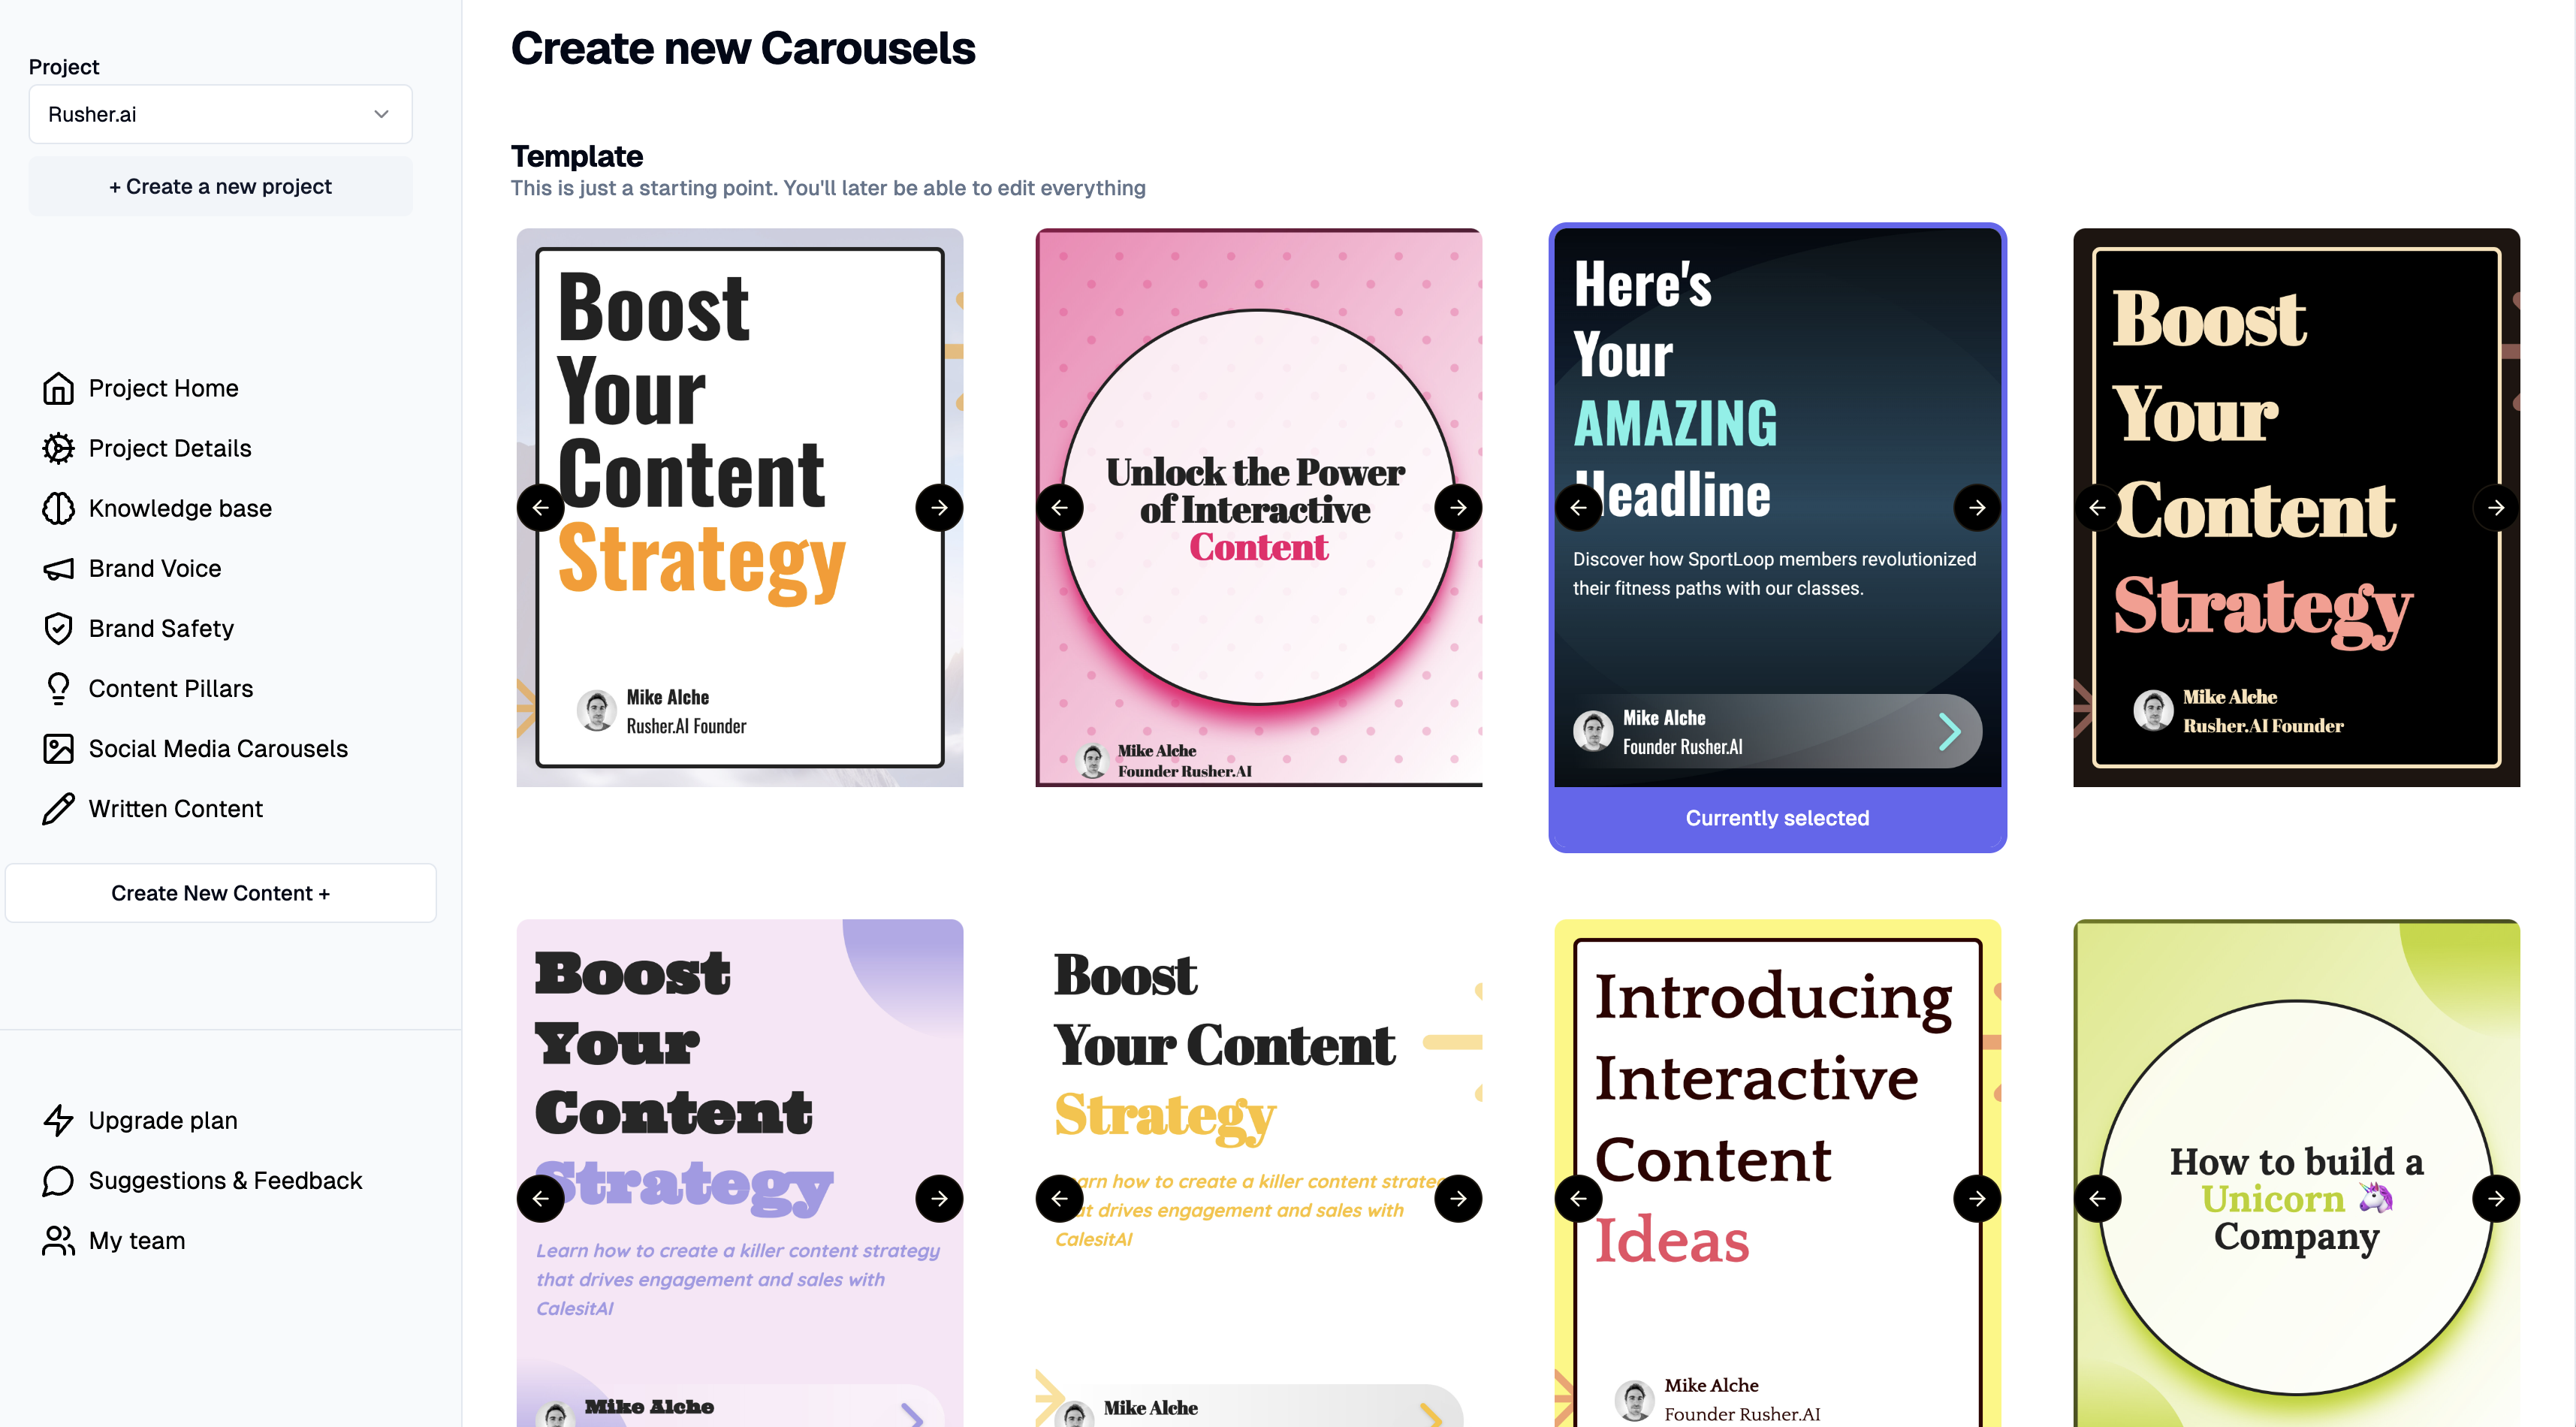
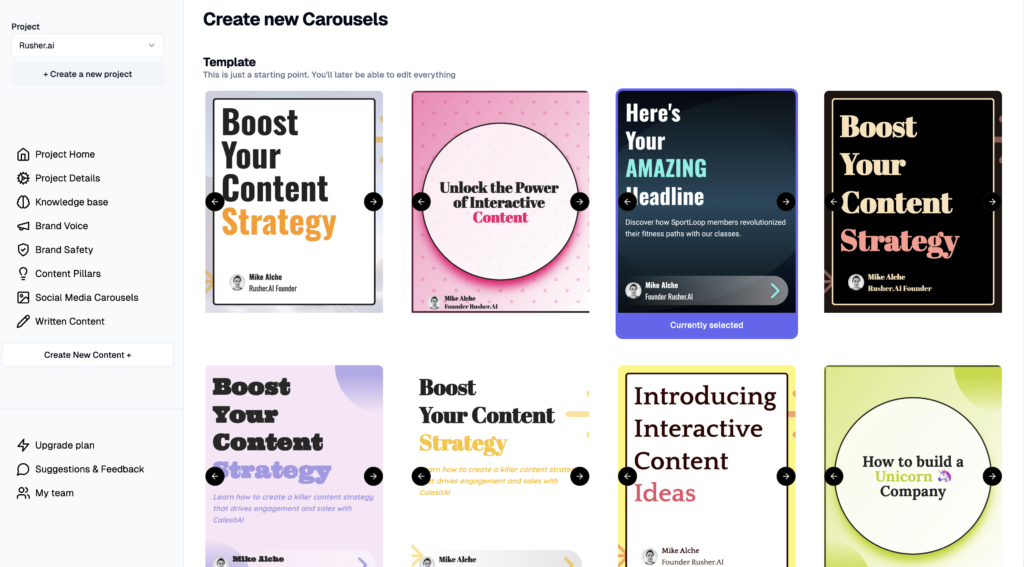
5. Picking a Template
Here’s where it gets fun. You’ll be greeted with a plethora of beautifully designed templates. Pick one that catches your eye. Remember, you can either stick with the template colors or switch it up using your brand’s colors. This flexibility is key for maintaining brand consistency and making your content stand out.
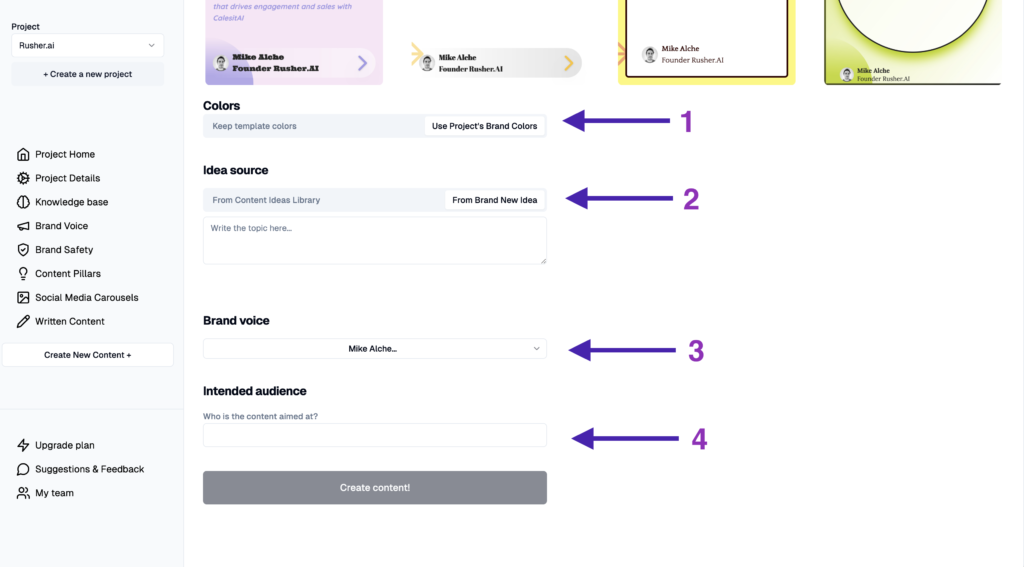
6. Choosing Your Idea, Brand voice and Target Audience
Alright, your template is set. Next up, choose the content idea. You’ve got options here—either go with one of the AI-generated ideas (they’re quite clever!) or input your own custom idea. Whatever you choose, this step is crucial in aligning your carousel content with your marketing goals.
Now comes one of the most strategic parts: defining your target audience. Who do you want to see this carousel? Explain to the AI copilot who is your target demographic. This ensures your content hits the bullseye in terms of engagement and relevance.
8. Pressing Go!
Drum roll, please! 🥁 Once everything is set—your template, colors, idea, and audience—it’s time to unleash your creation. Hit that “Go” button, and watch Rusher.ai work its magic. In just moments, you’ll have a polished, engaging social media carousel ready to captivate your audience.
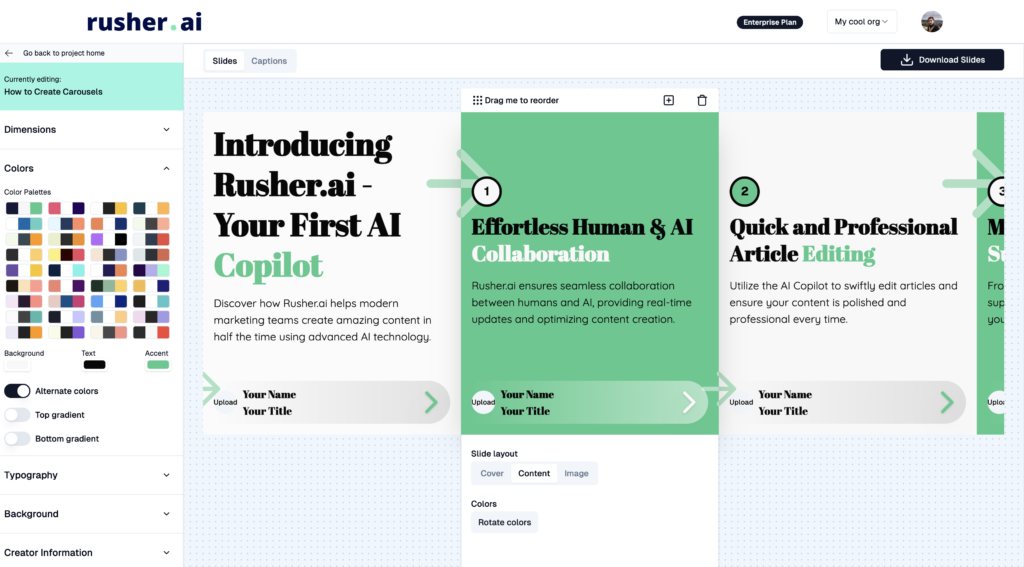
9. Review and Edit
Your carousel is ready, but let’s add the cherry on top. Review the generated content and make any tweaks if needed. Use the in-place editing feature to ensure every image and piece of text aligns perfectly with your brand voice and message.
Final Thoughts
Congrats! You’ve not just created your first social media carousel, but you’ve done it in style—AI style! Remember, the key to successful social media marketing is consistency and creativity, both of which are at your fingertips with Rusher.ai. So go ahead, explore more, innovate, and watch your social media game soar to new heights.
And hey, if you ever have feedback or need help, don’t hesitate to reach out. We’re all ears and constantly improving to make your content creation experience even better. Happy content creating!
Catch you on the flip side, Mike Alche