How to Invite Team Members to your Rusher.AI’s Organization
Hey there! Adding team members to your Rusher.AI organization for seamless, real-time collaboration? You’ve come to the right place. I’m going to break it all down for you, step by step, and throw in some tips along the way. Let’s get your marketing super squad assembled! 🚀
Step 1: Navigate to the “My Team” Section
First off, we need to get to the heart of where all team activities happen. You’ll find the “My Team” section at the bottom left corner of your screen.
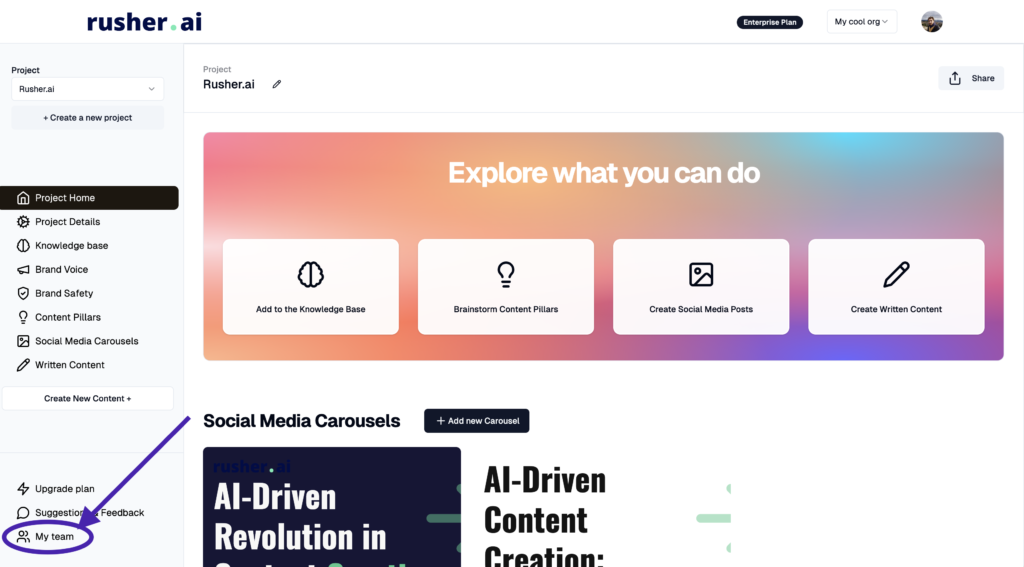
- Locate the ‘My Team’ section – Look toward the bottom left corner of your Rusher.AI dashboard. See it? Perfect.
- Click on ‘My Team’ – Click on that bad boy to open up the team management screen.
This page is where the magic happens—just like the Avengers, but with a lot less fighting and way more content creation.
Step 2: Customize Your Organization’s Name
Once you’re in the “My Team” section, you’ll have the opportunity to tweak your Organization’s name. Why does this matter? Because it’ll make those Invite emails look super official and spiffy.
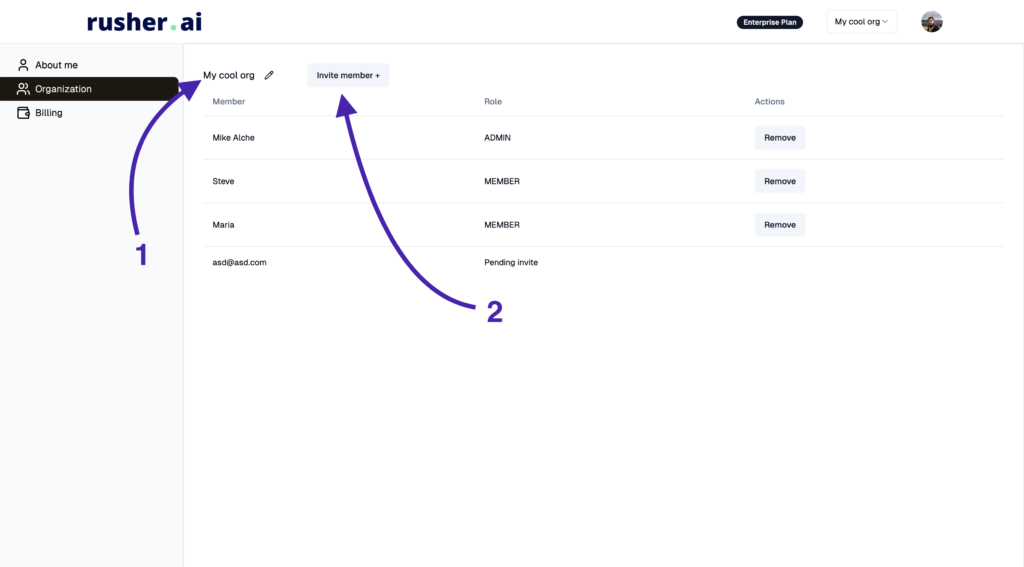
- Find the Organization Name Field – Right at the top, you should see the current name of your organization.
- Customize It – Click on the name field and type in whatever fits your team’s vibe. Whether it’s “Marketing Mavericks” or “Content Ninjas,” make it your own!
Step 3: Verify Your Subscription Plan
Before you get all click-happy with the Invite button, it’s important to ensure that your subscription plan accommodates multiple seats. Otherwise, you’ll hit a roadblock faster than you can say “Oops, my bad!”
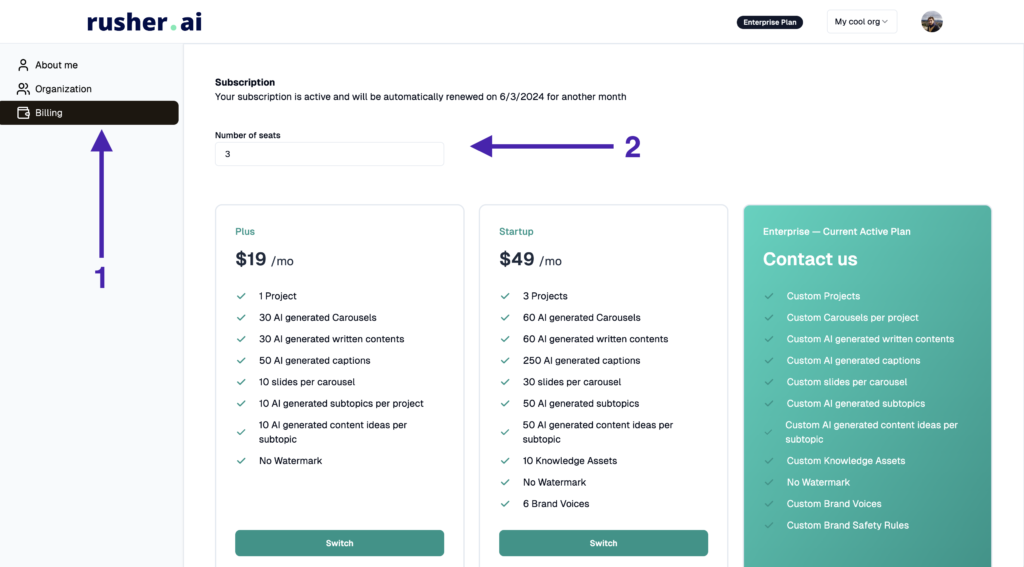
Here’s how to check and upgrade your plan if needed:
- Go to the Billing Page – Navigate over to your Billing settings.
- Check Your Seats – Look at the number of seats your current plan supports.
- Upgrade If Needed – If you don’t have enough seats, follow the prompts to increase your seat allocation. You’ll need enough seats to accommodate all the team members you plan to add.
Step 4: Click the “+ Invite” Button
Now that you’ve got your seats squared away, it’s time to start sending out those golden tickets!
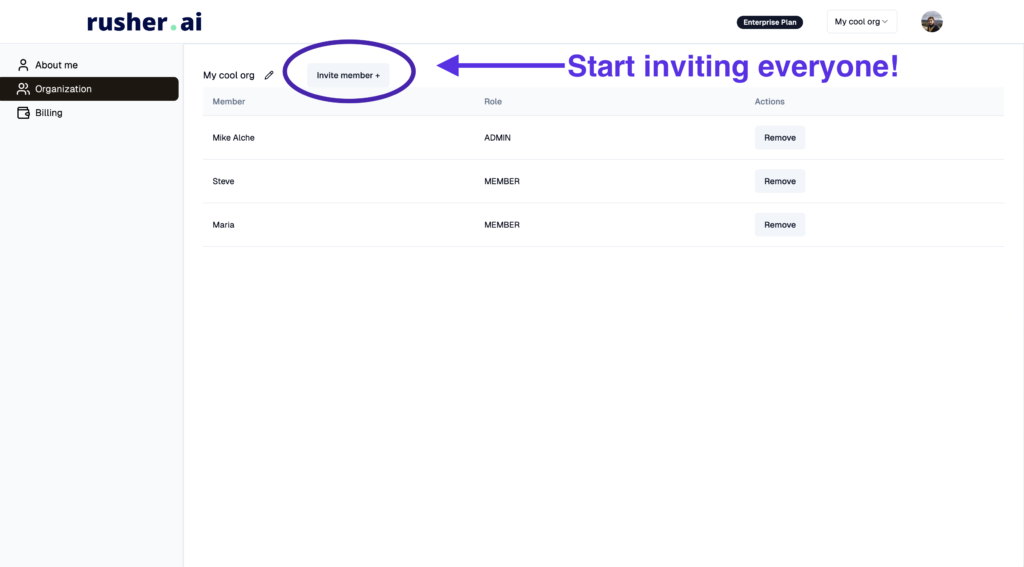
- Click on ‘+ Invite’ – This magical button is your gateway to team collaboration. Find it and give it a click.
Step 5: Enter the Email of Your Teammate
Time to make it official. Entering your teammate’s email is easy-peasy and the start of something amazing.
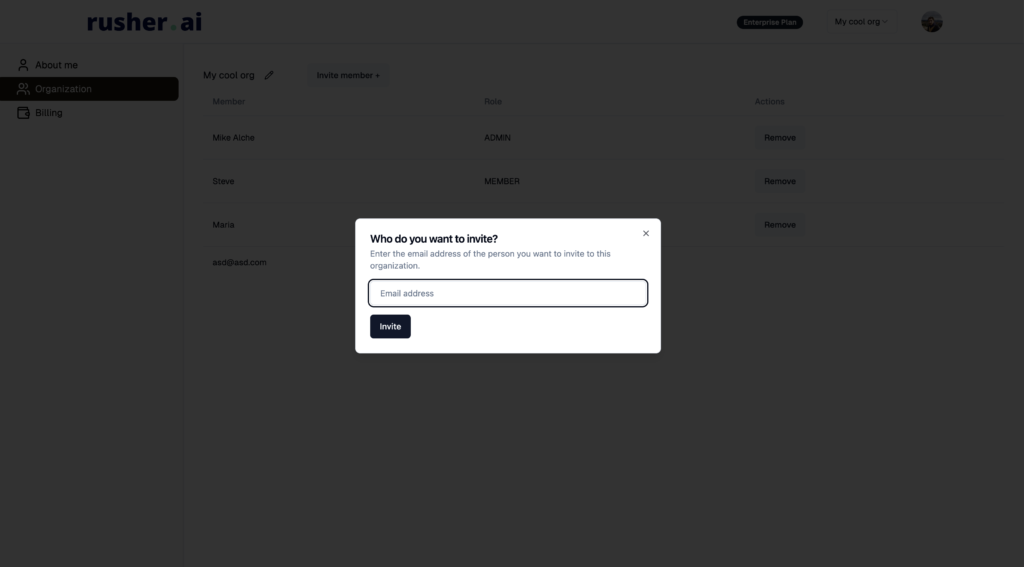
- Type the Email – Enter the email address of the person you want to invite. Double-check it to make sure it’s correct—mistakes happen to the best of us!
- Send the Invite – Hit that ‘Send Invite’ button. Your teammate will receive an email invitation to join the fun.
Step 6: The Invitation Process
What happens next? Your teammate gets that golden ticket in their email inbox and just has to follow a few simple steps.
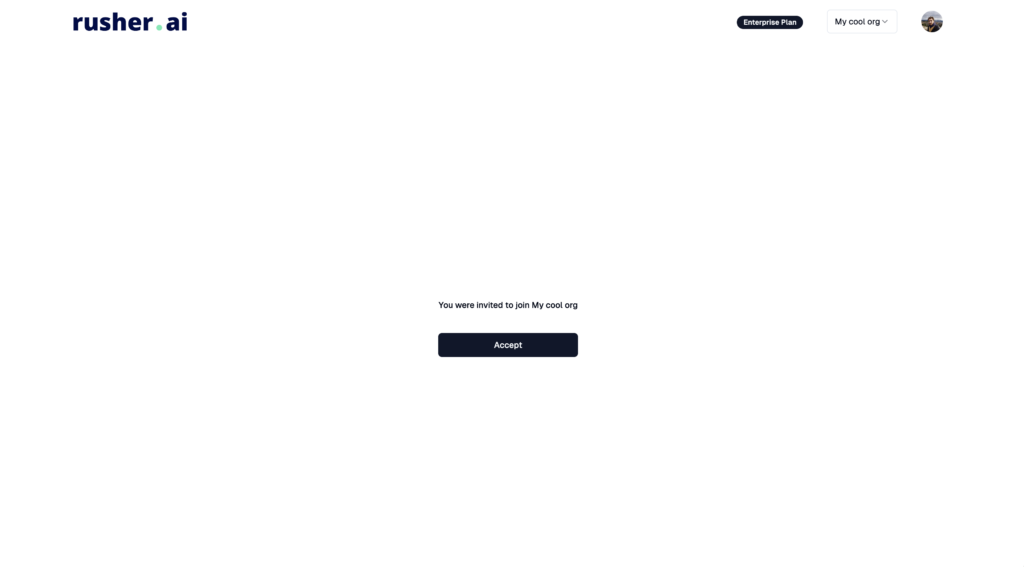
- Check the Email – Your teammate finds the Rusher.AI invite in their inbox. (Remind them to check their spam folder if they don’t see it right away!)
- Click Join – They click the ‘Join’ button in the email.
- Create an Account – They’ll be prompted to create a Rusher.AI account if they don’t already have one.
- Automatically Joined – After completing the signup process, they’ll be automatically added to your organization.
Voila! You’re Ready for Real-Time Collaboration
And there you have it! Adding a teammate to your Rusher.AI organization is as simple as that. Here’s a quick recap:
- Navigate to “My Team” and customize your Organization’s name.
- Ensure that your subscription plan supports additional team members.
- Click the “+ Invite” button.
- Enter your teammate’s email, and they’ll receive an invitation.
- Once they join, they’re automatically part of your crew!
Now that your team is assembled, you can collaborate in real-time, creating dreamy content together effortlessly. With each member working their magic, your marketing team will be unstoppable.
Happy Marketing and may your content be ever engaging and effective! 🚀
Got any questions or need further help? Just holler. I’m here to make your Rusher.AI experience smooth and stellar. Cheers! 🌟


